
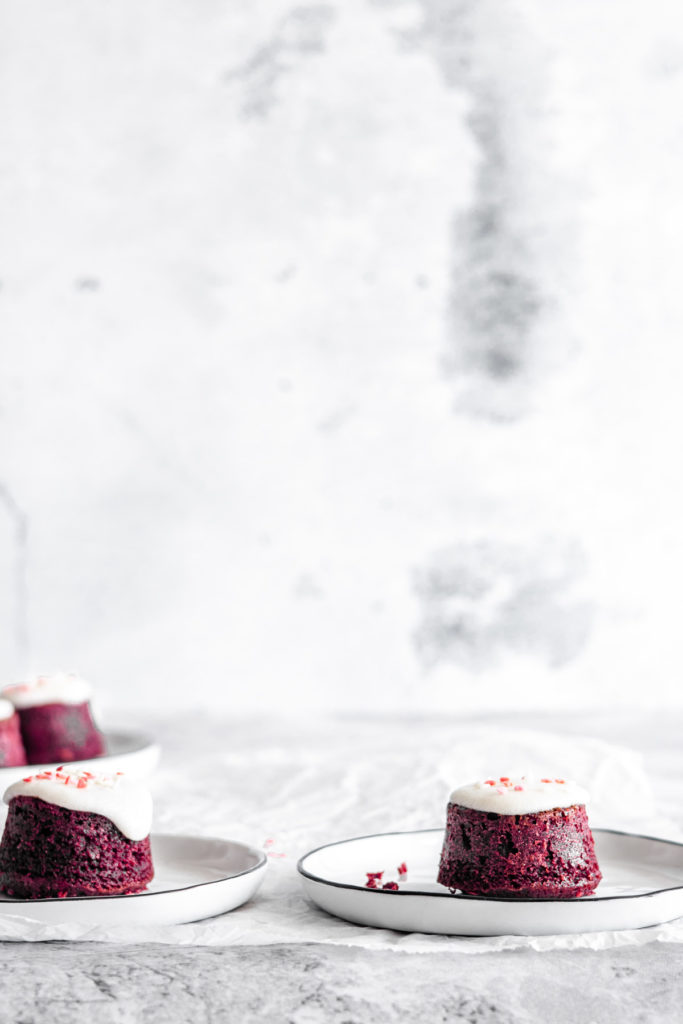
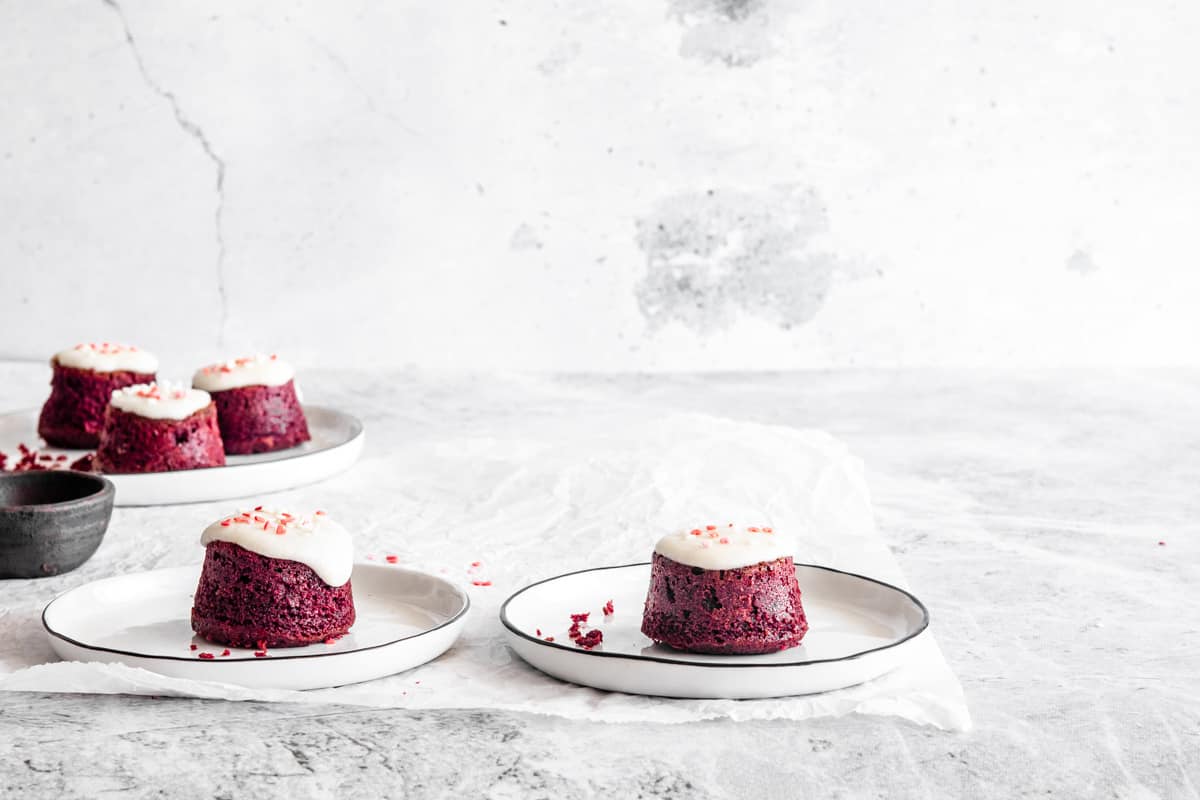
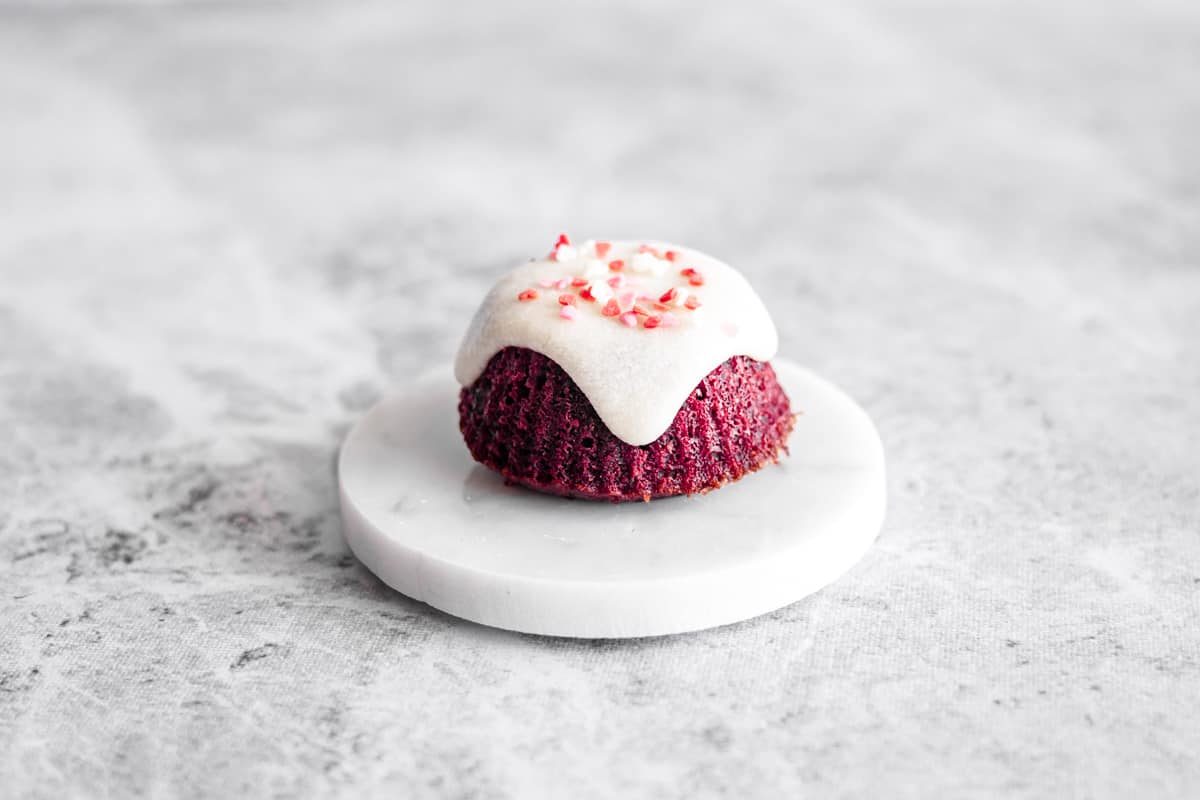
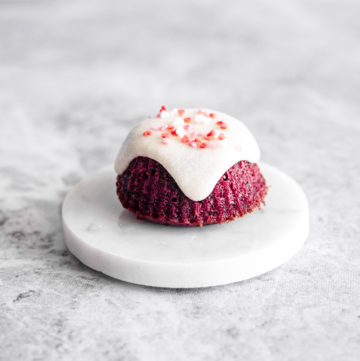
These Mini Red Velvet Cakes drizzled with cream cheese glaze and topped with sprinkles make the perfect holiday treat!
With Valentine's Day just around the corner, nothing screams the holiday better than red velvet desserts! After last year's Red Velvet Sheet cake with Mascarpone Cream Cheese Frosting, this time I tried my luck on Mini Red Velvet Cakes with Cream Cheese Glaze.
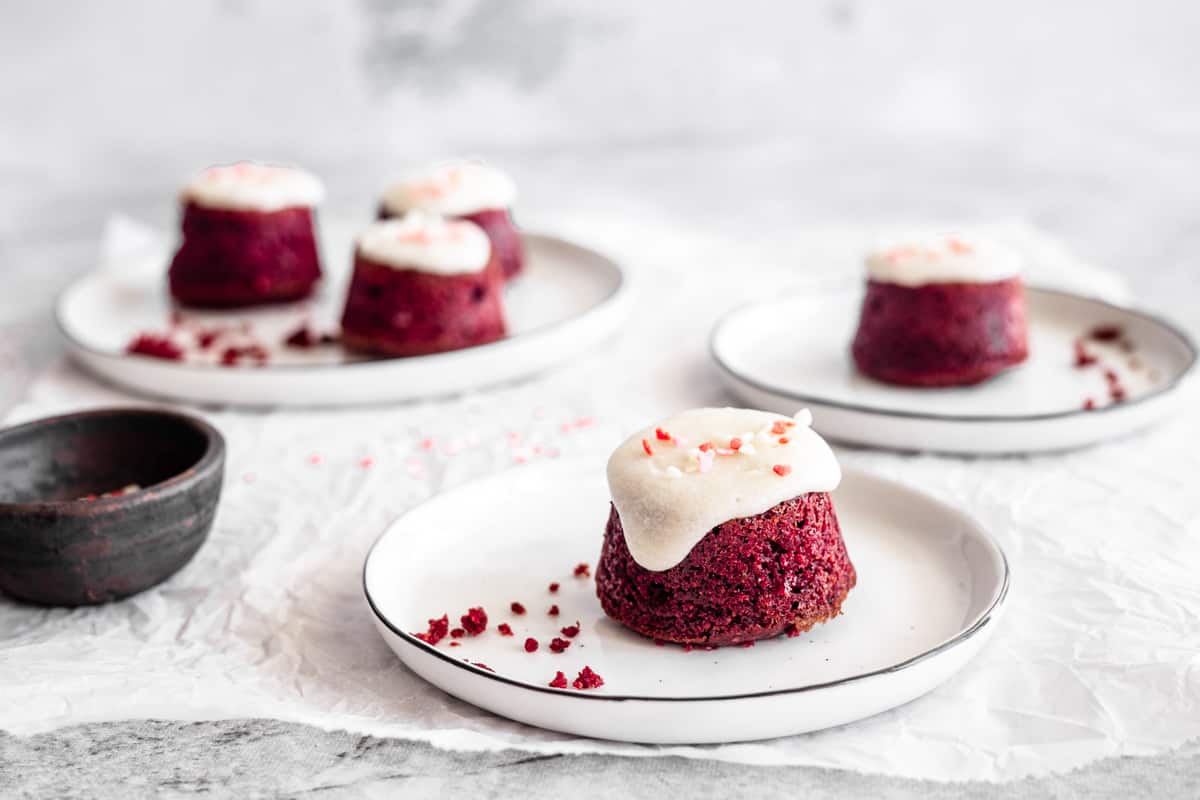
These little cakes are the perfect treat for valentine's day or special occasions - because there's nothing seasonal about red velvet! These mini cakes also make the perfect bite-sized treats without the need to have a large slice of cake! They're also quicker and simpler to make than a regular frosted cake.
These mini red velvet cakes in their beautiful red color are drizzled with velvety cream cheese glaze and topped with cute heart-shaped sprinkles.
All you need for these is a regular or silicone muffin pan and you're good to go!
Ingredients and Variations
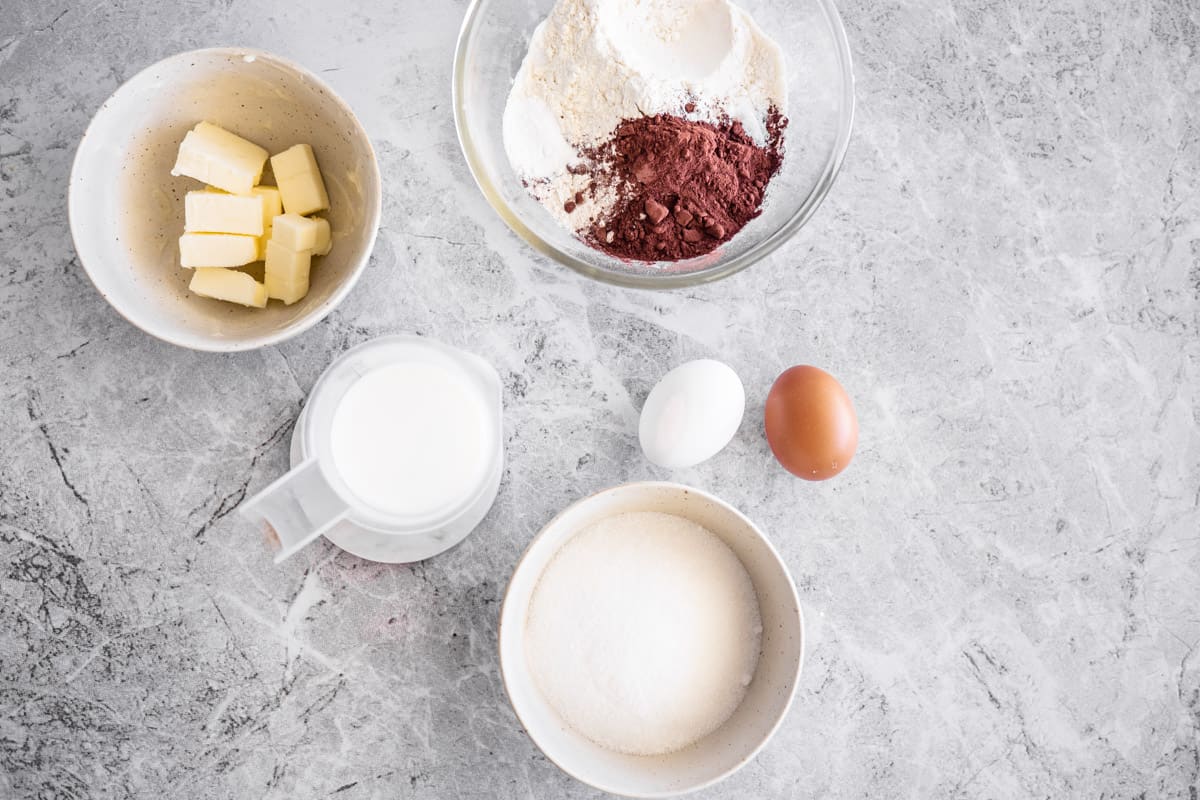
For the mini red velvet cakes, you will need:
- The Dry Ingredients: You will need cake flour (or all purpose flour), baking powder, baking soda, salt, unsweetened cocoa powder.
Always weigh your ingredients using digital kitchen scales for accuracy. If cake flour is not available, AP flour works just as well! - Granulated sugar - or caster sugar.
- Butter - use unsalted butter softened to room temperature. You may need extra butter (or cooking spray) to grease the muffin pan. You can also use a silicone muffin pan without the need to grease it.
- Eggs - for texture and binding.
- Buttermilk - If buttermilk is not available, you can make your own by adding some white vinegar to dairy milk.
- Vanilla extract - for flavoring.
- Red food coloring - in liquid or gel form.
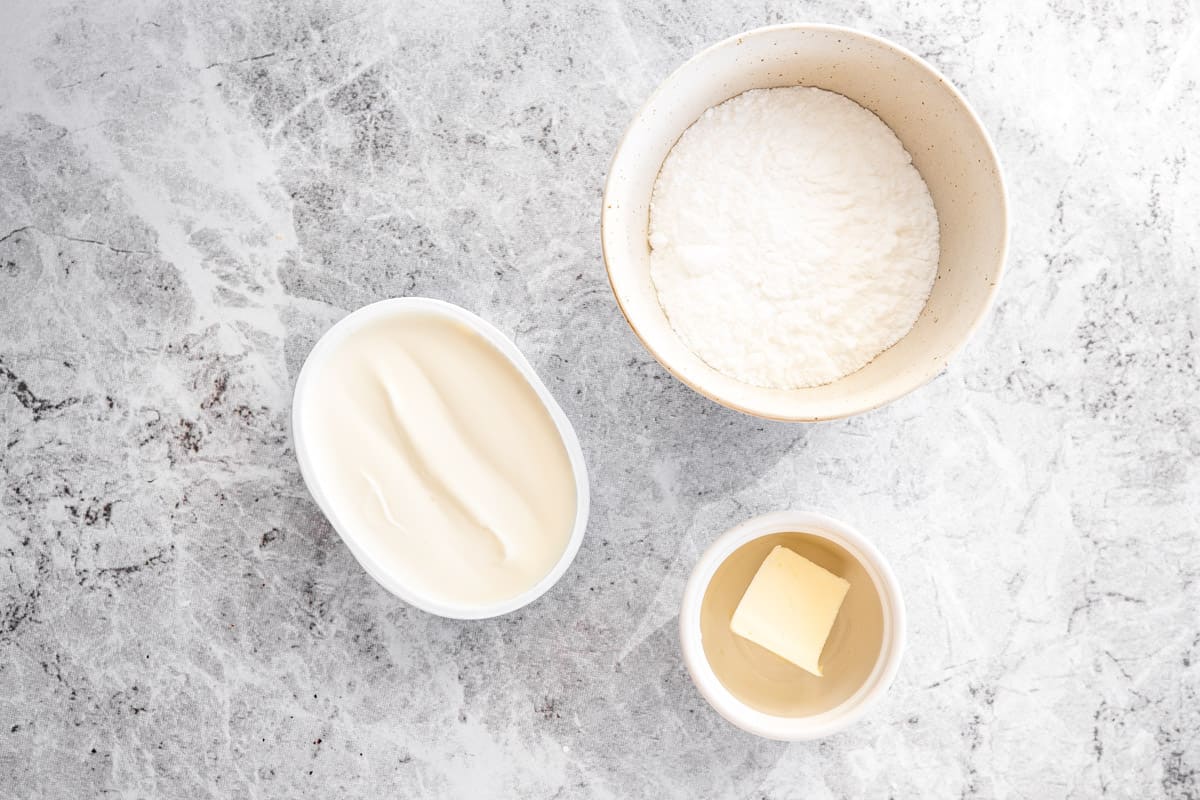
For the cream cheese glaze, you will need:
- Cream cheese - full-fat or low-fat, softened to room temperature. Do not use cream cheese straight out of the refrigerator.
- Butter - unsalted butter softened to room temperature.
- Vanilla extract - this is optional, but a great flavor enhancer
- Powdered sugar - or icing sugar.
- Milk - semi-skimmed or whole, to thin the glaze.
How to Make Mini Red Velvet Cakes
Preparation
Preheat the oven to 200°C (400F).
If you're using a regular metal muffin pan, start by greasing the muffin molds with melted butter or spray with cooking spray. Then, lightly dust the greased pan with cocoa powder or flour. Tap the pan and discard excess flour.
I suggest using a silicone muffin tray or silicone muffin molds as these are non-stick and ideal for mini cakes.
Make the Batter
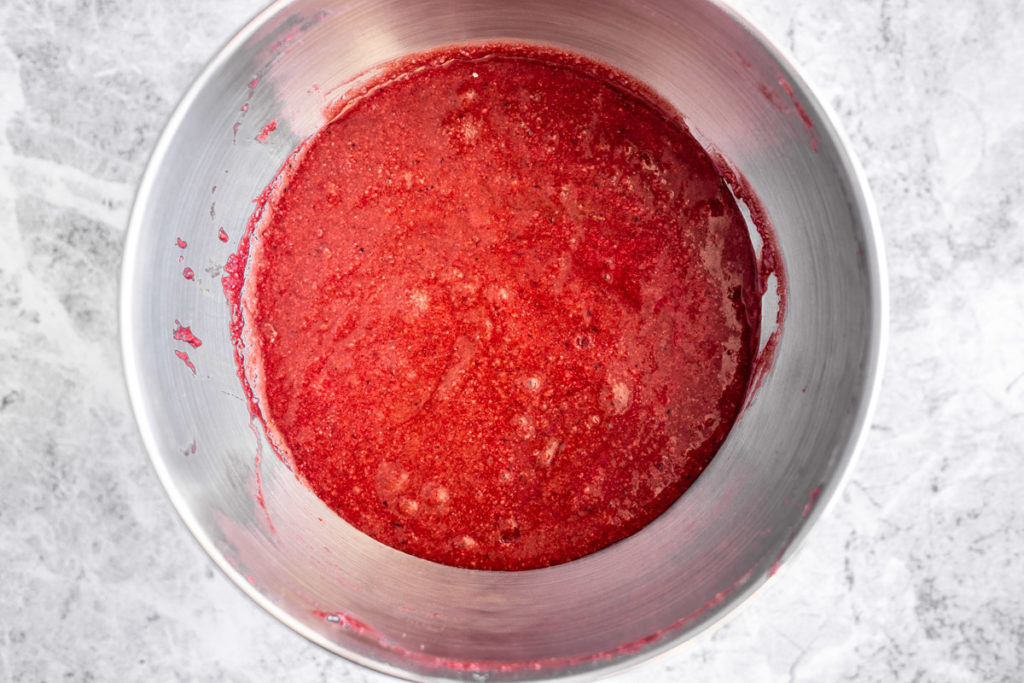
In a medium-sized bowl, sift and mix the dry ingredients (flour, baking powder, baking soda, cocoa, and salt). Set aside.
Place the sugar and butter in a large mixing bowl of a stand mixer fitted with the paddle attachment. You can also use a handheld electric mixer. Mix on medium speed for 1-2 minutes until the mixture is pale and fluffy. Scrape any ingredients from the side of the bowl using a spatula.
Add eggs, one by one, and mix well after each one. Then, add the vanilla extract and red food coloring. You want to go for a deep red color - but not too dark - the color will darken once you add the flour and cocoa mixture.
Add half of the dry ingredients, alternating with half of the buttermilk and mix the batter on slow speed until just combined. Repeat for the remaining dry ingredients and buttermilk.
Divide the cake batter between 12 muffin cavities, filling ⅔ to ¾ of the way. Do not overfill the muffin pan - these are mini cakes, not bakery-style muffins!
Bake
Bake the mini cakes for 5 minutes on 200°C (400F), then without opening the oven, decrease the temperature to 190°C (375F) and bake for another 12-18 minutes or until a skewer inserted into the center comes out clean. The baking time varies depending on the amount of batter used and different ovens.
Cool Down
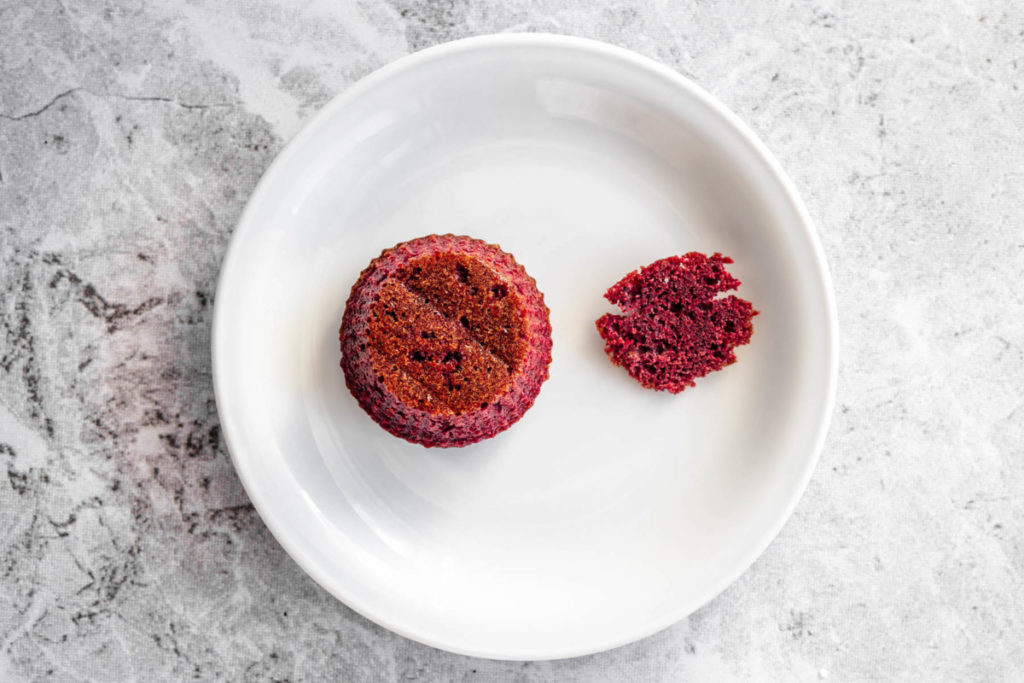
Let the cakes cool in the muffin pan for 5-10 minutes, then transfer bottom side up (like an inverted muffin) to a wire rack - you may need to slice the top of the cake. TIP: you may need to use a palette knife to scrape the edges from the side of the muffin pan. Let the cakes cool completely before glazing.
Glaze
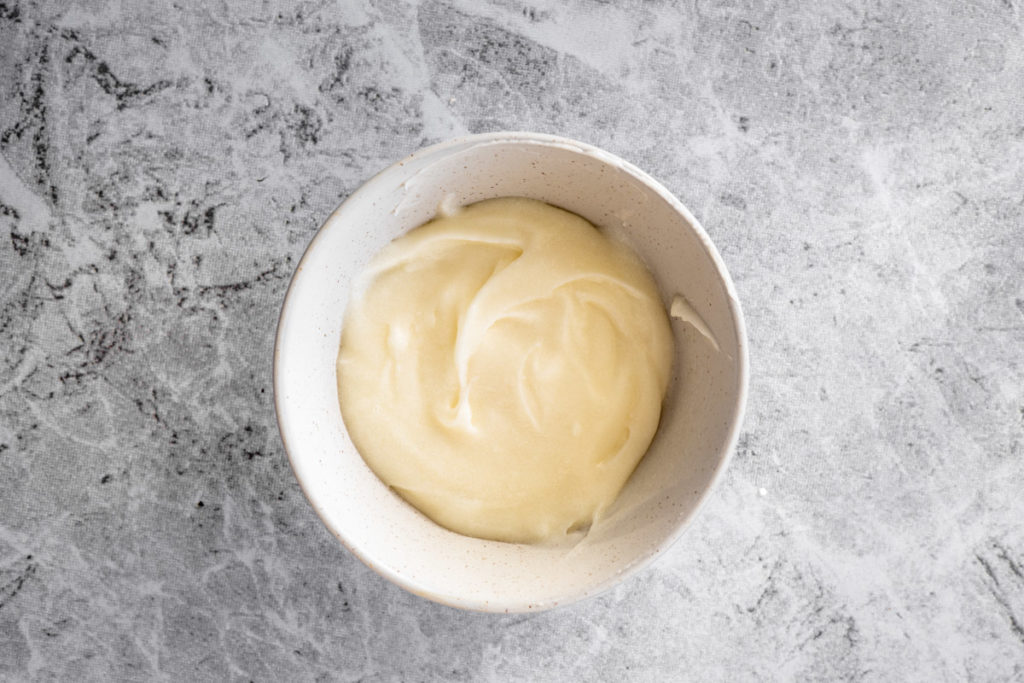
To make the glaze, beat the softened cream cheese and butter together until soft and fluffy. You can use a handheld mixer or a stand mixer fitted with the paddle attachment. Then, add vanilla extract (if using) and powdered sugar and mix until smooth.
Add milk, one tablespoon at a time, until the desired consistency is reached. Drizzle over cooled mini cakes and top with your favourite sprinkles!
Please note, this glaze will set, but does not harden like typical glaze.

Can I Use Regular Milk Instead of Buttermilk?
This is a common question amongst those wishing to bake red velvet desserts. The short answer is yes, but you'll need to add some white vinegar. Just stir in 1½ teaspoons white vinegar into ½ a cup of milk. I would not suggest using milk on its own (without adding vinegar), because buttermilk (or its substitute) is what gives red velvet bakes their unique taste!
Tips and Tricks
- Weigh your ingredients using digital kitchen scales for accuracy.
- Use room temperature ingredients, especially flour, cocoa powder, butter, eggs, and buttermilk.
- Use a silicone muffin pan or muffin cups if available. They are non-stick and do not need greasing or preparation.
- Use softened cream cheese for the glaze. Bring out the cream cheese to room temperature a couple of hours before using it. If time does not permit, transfer the cheese to a microwave-safe bowl and heat on low for 5-10 seconds. Then, stir the cream cheese until smooth.
- This cream cheese glaze will set but will not harden completely like typical glaze. Avoid stacking glazed red velvet cakes on top of each other.
How to Store Red Velvet Cakes
Store these Mini Red Velvet Cakes in an airtight container at room temperature for up to 4 days. In warmer temperatures, store them in an airtight container in a refrigerator. Do not stack glazed muffins since the glaze does not harden.
You Might Also Like
Red Velvet Sheet Cake with Mascarpone Frosting
Jam Tart Cookies
Mini Red Velvet Cakes with Cream Cheese Glaze
Ingredients
Mini Red Velvet Cakes
- 175 g flour all-purpose or cake (approx. 1½ cups minus 1 tbsp)
- 15 g cocoa powder unsweetened (approx. 2 tbsp.) + extra for dusting
- 1 tsp. baking powder
- ¼ tsp. salt
- pinch baking soda
- 112 g unsalted butter softened (½ cup) + extra (melted) for greasing
- 200 g granulated sugar (1 cup)
- 2 medium-sized eggs
- ½ tsp. vanilla extract
- 125 mL buttermilk (½ cup)
- ½ to 1 tbsp. red food coloring liquid or gel
Cream Cheese Glaze
- 90 g cream cheese (½ cup) softened
- 30 g unsalted butter (2 tbsp.) softened
- 120 g powdered sugar (1 cup)
- ½ tsp. vanilla extract optional
- 2-4 tbsp. milk semi-skimmed or whole
- 1-2 tbsp. heart-shaped sprinkles optional
Instructions
Mini Red Velvet Cakes
- Preheat oven to 200°C (400F). Grease a muffin pan with melted butter or baking spray and lightly dust with some cocoa powder or flour. Tap the pan and discard excess flour. You can also use a silicone (non-stick) muffin pan.
- Sift and mix flour, cocoa powder, baking powder, salt, and baking soda in a medium-sized bowl and set aside.
- Place butter and sugar in a large mixing bowl of a stand mixer fitted with the paddle attachment. Mix on medium speed until fluffy (around 2 minutes). Use a spatula to scrape any ingredients from the side of the bowl.
- Add eggs, one by one, mixing well after each addition. Add vanilla extract and mix in red food coloring (liquid or gel). You'll need to add enough food coloring to achieve a deep red color (amount depends on the type of coloring used).
- Add half of the dry ingredients, alternating with half of the buttermilk and mix on slow speed until just combined. Repeat for the remaining dry ingredients and buttermilk.
- Divide the batter between 12 muffin pan cavities, filling ⅔ to ¾ of the way (do not overfill).
- Bake for 5 minutes on 200°C (400F), then without opening the oven, decrease the temperature to 190°C (375F) and bake for another 12-18 minutes or until a skewer inserted into the center comes out clean.
- Let the cakes cool in the muffin pan for 5-10 minutes, then transfer upside down (like an inverted muffin) to a wire rack (you may need to use a palette knife to scrape the edges from the side of the muffin pan). Let the cakes cool completely before glazing.
Cream Cheese Glaze
- Place butter and cream cheese in a large mixing bowl of a stand mixer fitted with the paddle attachment (or use a handheld mixer). Beat until soft and fluffy.
- Add vanilla extract and powdered sugar and mix until smooth.
- Stir in milk, one tablespoon at a time, until the desired consistency is reached.
- You can cover and refrigerate the glaze for up to 2 days, then bring out to room temperature (you may need to warm the glaze for a few seconds in the microwave) before using.
- Drizzle over mini cakes and allow to set. The glaze will set but will not harden completely. Top with your favourite sprinkles or extra red velvet crumbs.
Leave a Reply